Install the applications before you secure the environment.
Every command on this page uploads through each app's SCM/Kudu endpoint. Creating private endpoints for the App Services turns that endpoint private-only, and that happens when the private endpoints are created — not later, when you disable public network access. From that moment this command times out from an ordinary workstation, and the timeout looks like a build or packaging problem rather than a network one.
The order that works:
- Deploy Azure Resources, including the SQL grant script.
- Install the applications — this page.
- Checklist after deployment to confirm the baseline works.
- Securing ILAP Analytics — reference example.
If the environment is already secured, run these commands from a machine that can reach the virtual network — your corporate network or VPN, or the test-access subnet router described in the securing guide. Nothing here works from the public internet once the apps are private.
Pre-requisites:
- Download and install Powershell (7+)
- Download and install Azure CLI tools for Powershell
Start Powershell and run the commands below.
#Login to azure, redirect to web browser
az login
Download the latest version of the software from the Deployment Center in Ilap DataExchange:
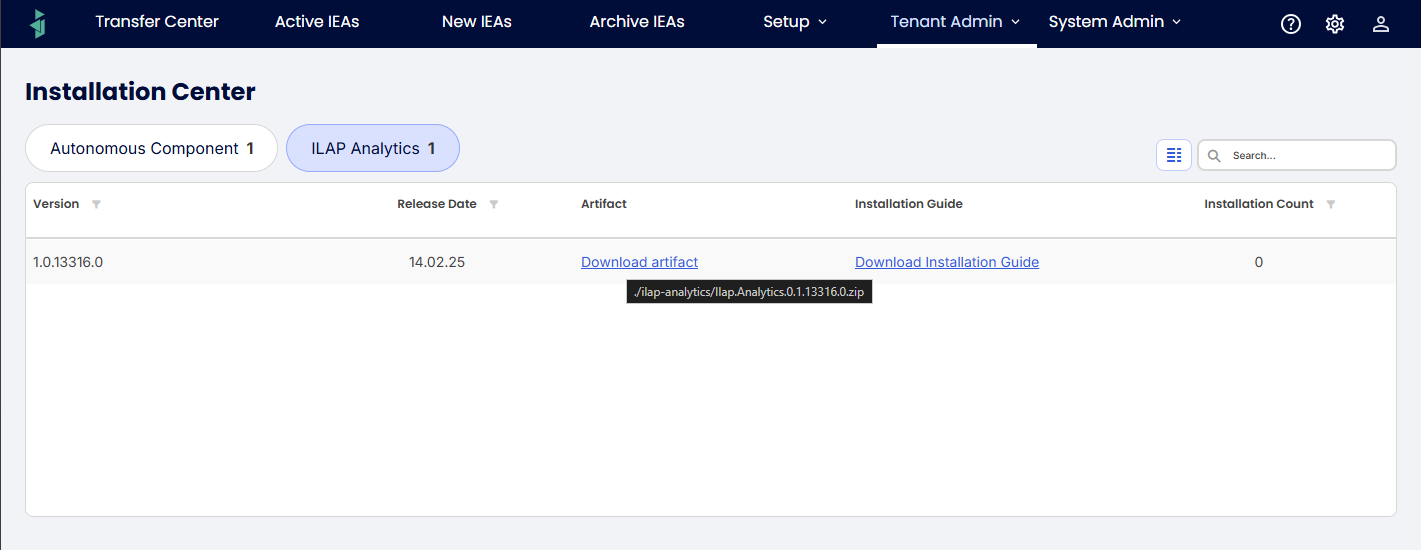
Unzip the artifact and you should see the following folders:
| File name | Description |
|---|---|
| Ilap.analytics.Ui.zip | React Web Frontend application |
| Ilap.Analytics.Api.zip | Api used from Frontend application and GraphQL/Rest queries from consumers |
| ILAP.Analytics.BackgroundJob.PortalServer.zip | Api running background jobs |
| Ilap.Analytics.IaC.zip | Bicep script files including sample parameter files |
The following steps in the guide assumes that the file names are kept as is.
##Set the active subscription
$SUBSCRIPTION = "your_subscription"
az account set --subscription $SUBSCRIPTION

##Confirm you are pointed at the environment you think you are
az account show --query "join(' ', [name, id])" -o tsv

$RESOURCE_GROUP = 'your_resource_group'
The three app names used below are the ones the deployment created. If you followed the
naming convention they are app-<org>-ia-api-<env>-<region>, -ui- and -bg- — see
Azure.IaC/NAMING.md in the deployment package. If you are unsure, list them:
az webapp list --resource-group $RESOURCE_GROUP --query "[].name" -o tsvFor deployment, we suggest using az webapp deploy using zipdeploy, for more information see this Microsoft learn article
Publish Ilap.Analytics.Api .Zip file
Run the commands in the powershell script below
$RESOURCE_GROUP = 'your_resource_group'
$WEBAPP_NAME = 'app_name_for_api'
az webapp deploy --type zip --resource-group $RESOURCE_GROUP --name $WEBAPP_NAME --src-path (Get-Item .\Ilap.Analytics.Api.zip).FullName
Publish Ilap.Analytics.BackgroundJobs .Zip file
Run the commands in the powershell script below
$RESOURCE_GROUP = 'your_resource_group'
$WEBAPP_NAME = 'app_name_for_backgroundjobs'
az webapp deploy --type zip --resource-group $RESOURCE_GROUP --name $WEBAPP_NAME --src-path (Get-Item .\ILAP.Analytics.BackgroundJob.PortalServer.zip).FullName
Publish Ilap.analytics.Ui.zip file
Run the commands in the powershell script below to deploy the Zipped file.
$RESOURCE_GROUP = 'your_resource_group'
$WEBAPP_NAME = 'app_name_for_ui'
az webapp deploy --type zip --resource-group $RESOURCE_GROUP --name $WEBAPP_NAME --src-path (Get-Item .\Ilap.analytics.Ui.zip).FullName
Was this article helpful?
That’s Great!
Thank you for your feedback
Sorry! We couldn't be helpful
Thank you for your feedback
Feedback sent
We appreciate your effort and will try to fix the article